Looking for a snack that’s convenient, healthy, and incredibly delicious? Homemade granola bars are the perfect solution! Easy to make and endlessly customizable, these bars combine pleasure and balance for a sweet treat any time of day, from breakfast to afternoon tea. Discover all our tips and tricks for making them at home and enjoy a healthy, economical snack that’s perfectly suited to your daily routine!

Why make your own cereal bars?
Still hesitating to get started? Here are a few good reasons to try the homemade cereal bar recipe:
Easy to make:
No need to be a chef to prepare them! With a few ingredients and about ten minutes of preparation, you get delicious bars full of good things.
Infinitely customizable:
Chocolate, dried fruit, seeds, spices… You choose exactly what you like and can vary the recipes according to your current desires, so you never get bored!
An economical alternative:
Store-bought bars can quickly become expensive. By making them yourself, you control the ingredients and quantities, saving money while enjoying a delicious treat.
Suitable for all diets:
Do you not consume animal products, foods with gluten, nor sugar? These bars easily adapt to your dietary restrictions and needs.
A practical and balanced snack:
Store-bought cereal bars are ideal for treating yourself from time to time! But, for a healthy and practical everyday snack, a homemade version is the perfect alternative to take to work or slip into your children’s schoolbag.
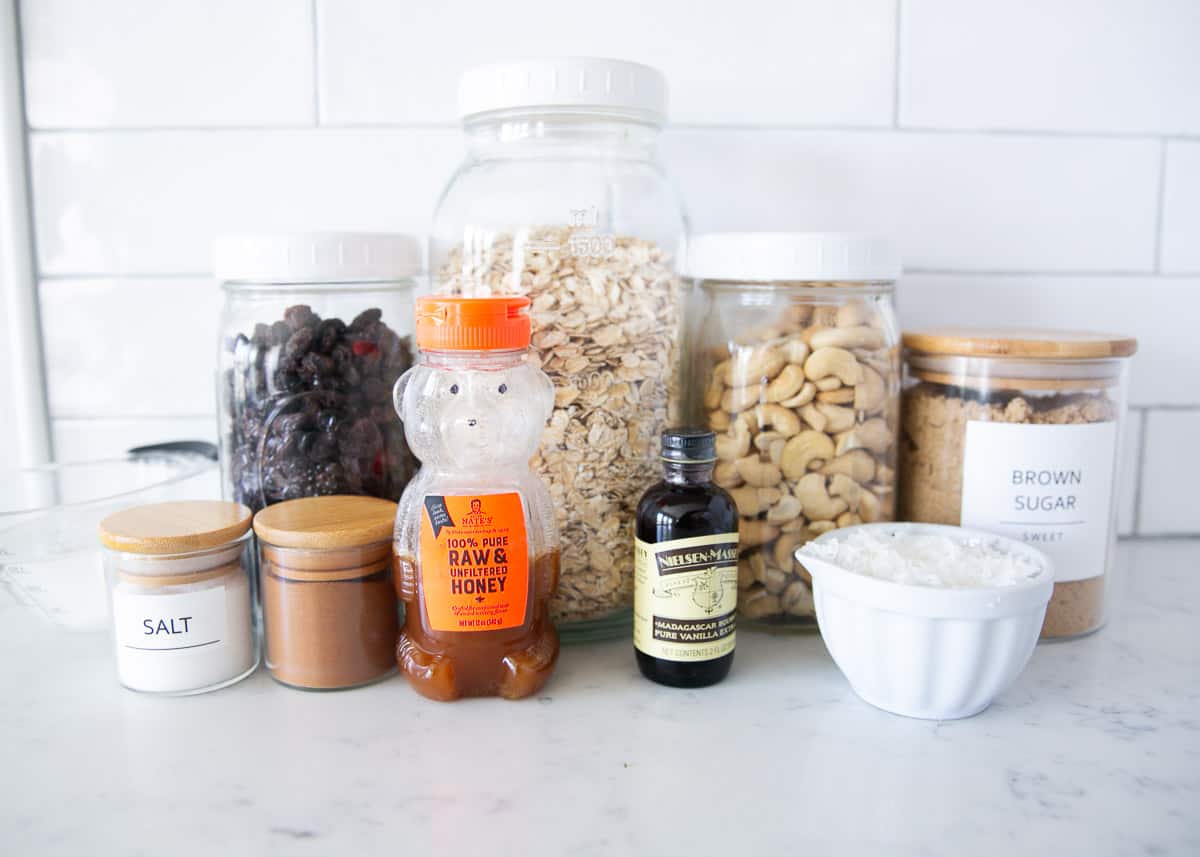
The essential ingredients for making successful homemade cereal bars
Preparing balanced and delicious homemade cereal bars starts with choosing the right ingredients:
Cereal and oilseed base
The base of your bars should be crunchy, nutritious, and high in fiber. To achieve this, mix several ingredients from the list:
- Flakes and cereals: oat flakes (classic or gluten-free), quinoa, rice or buckwheat, but also unsweetened corn flakes, puffed rice or quinoa for a light and crispy touch.
- Nuts and seeds: walnuts (classic, pecan or cashew), almonds, hazelnuts, pistachios, pumpkin seeds, sunflower seeds, chia or sesame seed, and even grated coconut!
Natural binders and sweeteners
Once the base is chosen, you need to bind the ingredients together and add a touch of sweetness with more liquid ingredients, which will also prevent your bars from becoming too hard.
- Natural sweeteners: honey, maple syrup, agave or date syrup, which allow sweetening without resorting to refined sugar.
- Sweetening alternatives: mashed bananas, applesauce, or date puree are good alternatives to sweeteners.
- Nut purees: peanut butter, almond puree, hazelnut or cashew nut puree, which provide a smooth texture and good fats.
Ingredients to customize your bars
Once the base and binders have been chosen, all that remains is to personalize your bars according to your desires and preferences:
- Dried fruits: raisins, cranberries, dates, figs, goji berries, apricots, plums, to boost energy.
- Dried fruits: bananas, apples, pears, strawberries, kiwis… almost all your favorite fruits also exist in dried form!
- Chocolate chips: dark, milk, or white, choose your favorite type of chocolate for a gourmet touch.
- Spices and flavors: cinnamon, vanilla, cocoa, orange zest, matcha, or even cardamom to flavor your bars.
Steps for homemade cereal bars
Preparing the ingredients
- Lightly toast the nuts and seeds in a pan or oven for extra crunch and flavor (optional).
- Roughly chop nuts and dried fruit if necessary.
- Preheat your oven to 160°C if you are opting for a cooked version.
Mixing of dry and wet ingredients
- In a large bowl, mix all the dry ingredients: cereal flakes, nuts and dried fruit, etc.
- Add the binder and/or sweetener, then mix well to coat all the ingredients.
- Incorporate the spices, chocolate, or other custom ingredient, then mix one last time.
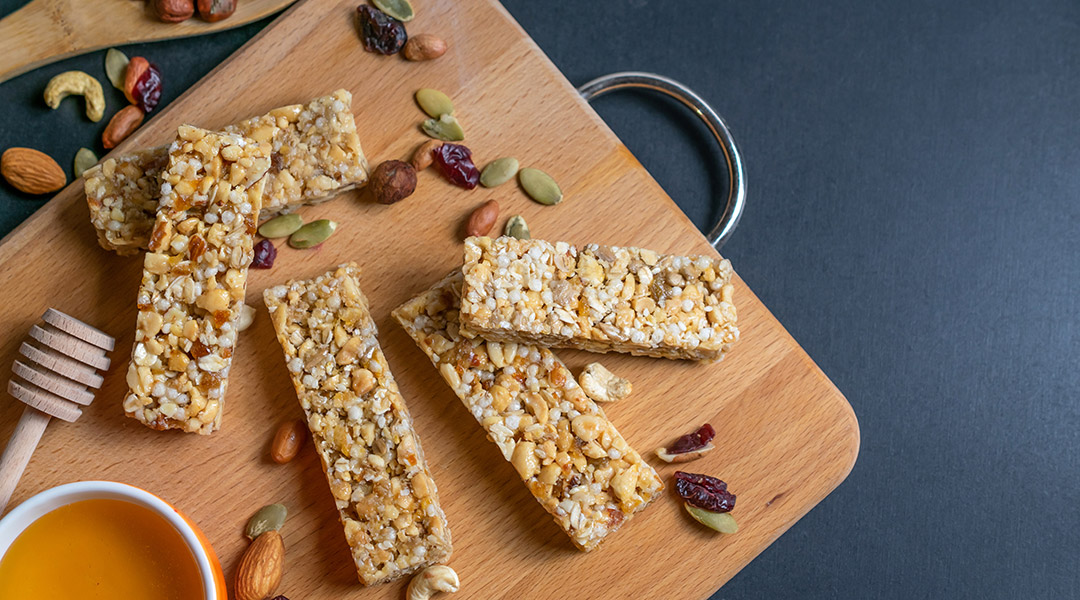
Molding and baking or refrigeration
- Pour the mixture into a rectangular baking tin lined with baking paper.
- Press down firmly with the back of a spoon so that the bars hold together after cutting.
- Bake for 15 to 20 minutes at 160°C or place in the refrigerator for at least 2 hours.
Baking or refrigerating?
If your recipe contains minimally processed whole grains (like puffed quinoa or buckwheat flakes), opt for the baked version for better digestion. It will also depend on the texture you’re looking for! If you like crispy, slightly caramelized bars, bake them. For a softer, easier-to-prepare version, refrigerating them is all you need.
Ideas for variations to make even healthier and more original bars
Want to personalize your homemade granola bars even more? Here are some other ideas you might not have thought of!
Protein-rich bars
For ideal bars after a workout or for a satisfying snack, you can add protein-rich ingredients such as almond or peanut butter, protein powder (whey, soy, pea), seeds (chia, flax, pumpkin), and even powdered milk for a smoother texture.
Gluten-free cereal bars
For a gluten-free alternative, replace regular rolled oats, which may contain traces of gluten, with buckwheat, quinoa, or rice flakes. You can also add almonds, hazelnuts, and seeds for a crunchier texture, or other ingredients suitable for a gluten-free diet.
Delicious bars with a coating
If you prefer a more indulgent snack, add a coating to your bars. The healthiest option is a dark chocolate coating, which is rich in nutrients and less sweet, but you can also opt for milk chocolate or homemade caramel. And, before the coating sets, add seeds or crushed dried fruit for extra crunch.
Breakfast version
You can use these bars for breakfast, provided you choose ingredients that are less sweet and more filling, such as oatmeal, fruit purees (banana, applesauce, date puree), dried fruit (almonds, peanuts), and seeds, while avoiding artificial sweeteners. You can also try a savory version with cashew nut puree, dried fruit, and spices. And if you’re looking for other breakfast ideas, check out our article: What to Eat for Breakfast ?